Home Decor Acmoore Sign Letters
Make a cute DIY wood sign that's interchangeable for different holidays.
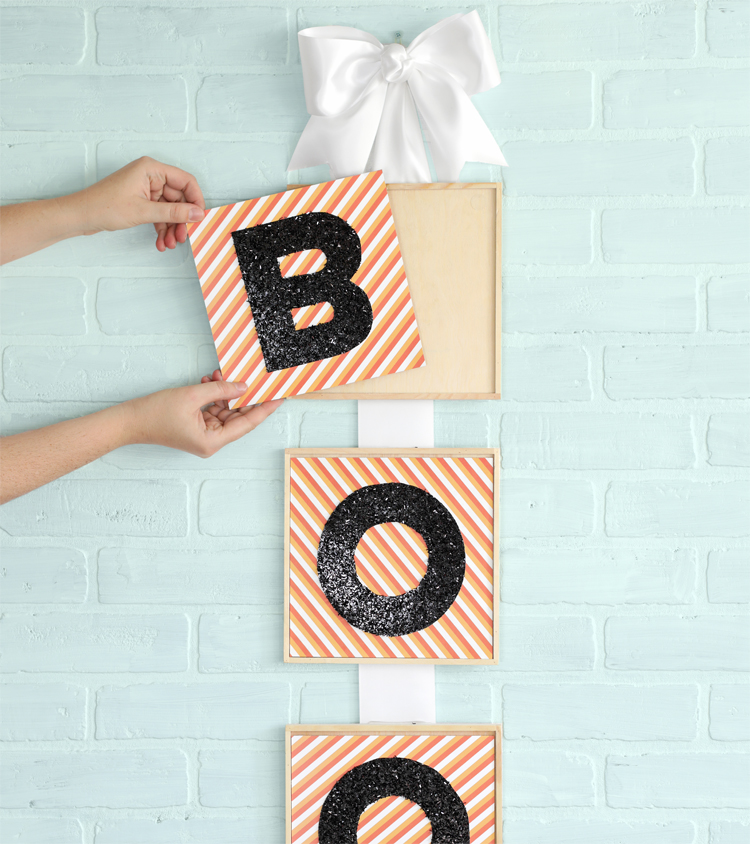
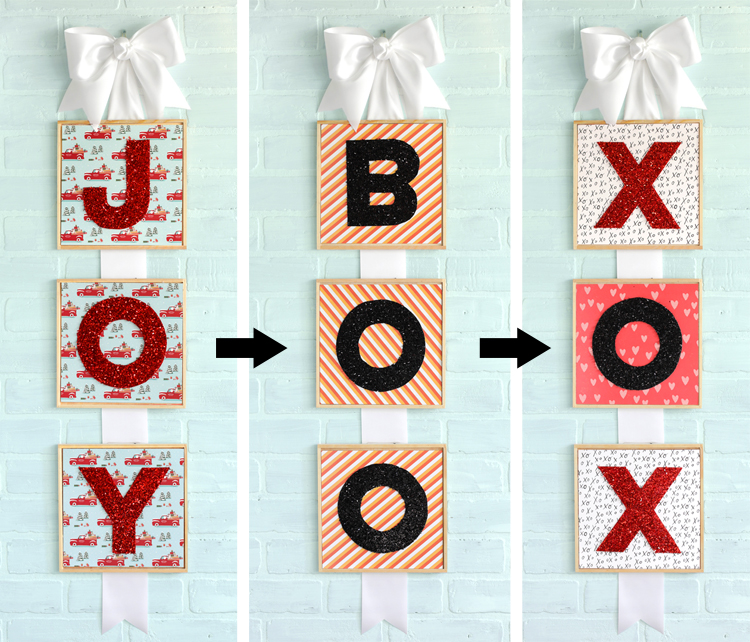
I love a decoration that can be switched out for different holidays. I just think it's so much fun! Plus it means the decor doesn't have to sit around taking up space in the off season. Today I'm going to show you how to make this vertical wooden sign with interchangeable letters for different holidays.
This post is sponsored by American Crafts.
This craft features a new-to-me product called tinsel paper. It's like glitter paper, but thicker. It has individual pieces of tinsel stuck to the page and is so sparkly and textured and cool. I want to use it for allllllllll the things!
I purchased all of the supplies for today's project from my local AC Moore craft store. They have an awesome selection of open stock paper in all the latest designs and that's also where I found the tinsel paper.
To make this project, you will need:
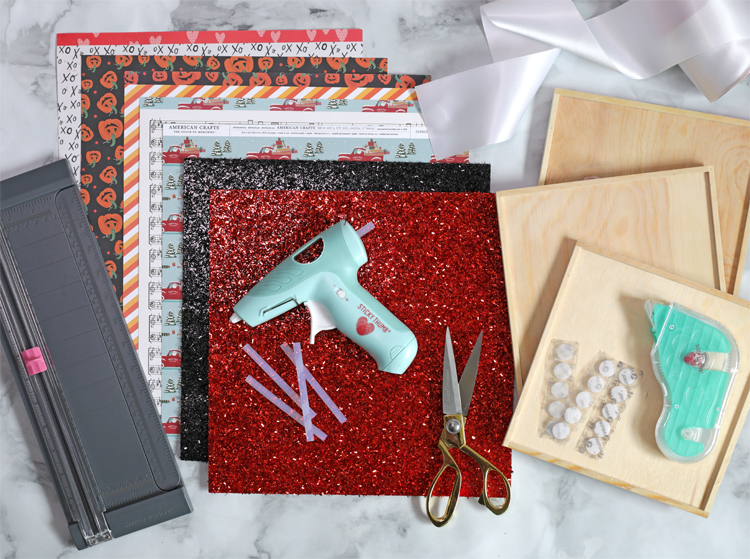
Materials Needed
- Tinsel Glitter Paper from AC Moore
- Assorted Holiday Patterned Paper from AC Moore
- 3 Wood Signs (mine measured about 8×8″) from AC Moore
- Wide Ribbon
- Velcro Dots
- Paper Trimmer
- Glue Gun + Glue Sticks
- Adhesive Tape Runner
- Scissors
FYI: I've included a video tutorial for this craft at the bottom of this post if you want to scroll down and watch the instructions instead of reading them.
Step 1: Measure the inside of the wood signs and cut patterned scrapbook paper to fit. You'll need 3 pieces of patterned paper for each holiday that you want to do (so 3 Halloween papers, 3 Christmas papers, 3 Valentine's Day papers, etc.).
Step 2: Add velcro dots to the four inside corners of the wood sign and the four corners on back side of each of the patterned papers. I did the scratchy side of the velcro on the wood and all of the papers have the soft side of the velcro.
Step 3: Print out some letters to use as a template. The font I used is called "Lulo Clean Outline Bold." Flip the letters over backwards, then trace them on to the back side of the tinsel paper. If you trace the letters right side up, they'll be backwards when you flip the tinsel paper over. Ask me how I know. In fact, if you watch the video tutorial, you'll see that I did it wrong for the letter "B" on the BOO sign. Doh! Rookie mistake!

Step 4: Cut the letters out of the tinsel paper. Run adhesive along the back of the letter and stick it to the center of the patterned paper.
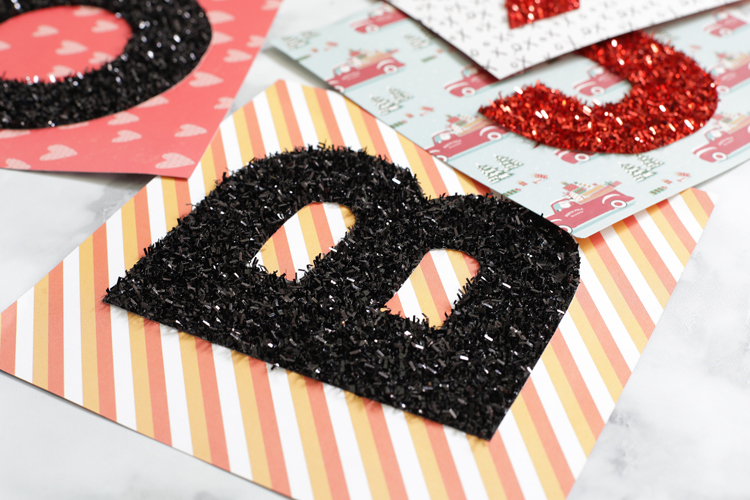 You can really see in this photo how thick and textured the tinsel paper is. Told you it was cool! In my opinion, it takes this project to the next level.
Step 4: Make a loop at the top of your ribbon and secure the end down with hot glue. Space the wood signs evenly down the ribbon, making sure they're centered. Glue in place. Optional: cut the end of the ribbon with an inverted v shape and add a bow at the top.
I only made letters for three holidays for now, but I definitely want to make one for the Fourth of July that says, "USA" and one for Easter that has three sparkly tinsel bunnies. I may also make a generic winter one with tinsel snowflakes just because they'd be so pretty and sparkly.
VIDEO TUTORIAL
Like this project? Pin it so you don't forget it.

This post was sponsored by American Crafts. All opinions are my own.
Home Decor Acmoore Sign Letters
Source: https://www.thecraftpatchblog.com/interchangeable-holiday-sign/